Wednesday 10 April 2013

How To Do A Kim K Inspired Sexy Black Smokey Eyes

Follow my blog with Bloglovin

Hey everyone I recently posted pictures up on my Facebook page of a sexy smokey eye, inspired by Kim Kardashians, whose makeup style I totally love !! I hope you all like it, here's how I created it .....


Step 1: Use some sellotape as a guide this makes the whole process so much cleaner looking and quicker to apply. Using a black base, I used my Maybelline Intense Drama gel liner, you don't have to be neat. 


Step 2: Blend out the black base upto the crease with a soft blending brush.


Step 3: Go over the black base with a black eyeshadow and blend it out upto the crease. I used Blackout from the Naked 2 Palette.


Step 4: Highlight the browbone, I used Bootycall (Light Gold Shimmer) from the Naked 2 Palette.


Step 5 :  Use a brown/burgandy shimmer colour in the crease and blend into the black and browbone, this will really warm the look up. I used the colour Busted from the Naked 2 Palette. Highlight the tear duct area with the same colour you used for your browbone.


Step 6 : This part is optional but I added a black pigment powder with abit of sparkle in it over the black just to deepen it more. I used the Illamasqua Pure Pigment Powder in Zeitgiest. If you don't want to use a pigment powder you can always go over it with the black if you feel its not dark enough but make sure you stay close to the lashline.


Step 7 : Line the top and bottom lashline with a black gel liner and remove the tape .


Step 8 : Add lashes and line inside your waterlines and your done xxx


If you have any questions or feedback I would love to hear from you. Remember, to keep up to date with my latest posts and news, follow me on Twitter @cosmeticzjunkie and like my Facebook Page Cosmeticz Junkie. 

Sunday 17 March 2013

A Step By Step Copper Smokey Eye Look

I recently posted some pictures on facebook & twitter of a smokey copper eye and got alot of response from it , so i thought I'd show you all how to do it. This is a dramatic heavy eye but can you believe it , you only need 3 products to achieve it !! I used a black base and placed my Barry M Dazzle Dust in Chocolate
(shade 53 ) over the top of it . The dazzle dust is an amazing product , super pigmented and really glistens  and the best thing is it only costs around £4.50. You can easily experiment with this look and use different colour pigments powders over the base. You can pick up these pigments from Superdrug and Boots, they've got a huge colour range !! You could even mix two colours together,now  let me show you the basics : 

Step 1: Use some sellotape to angle your eye and get the desired shape (scotch off on the back of you hand first before you apply it to your eye area ) using a black base , I used a Black gel liner , apply it up to your crease .


Step 2 : Blend it out over your crease .

Step 3: Use the pigment powder and place over the top of the black base .


Step 4: Blend the pigment over the eye and soften the edges , blending it into the black base.


Step 5: Line your top lash line with a gel liner , the sellotape will make application so easy .


Step 6: Remove the tape and you should be left with a crisp line :)


Step 7: Line the bottom lashline and connect it to the top lashline using the gel liner.


Step 8: Line the inside of your eye top & bottom and highlight the browbone with any shimmery gold eyeshadow you have , finally add lashes to complete the look . 

Final Look


This is a simple look to create with maximum effect !!

If you have any questions or feedback I would love to hear from you. Remember, to keep up to date with my latest posts and news, follow me on Twitter @cosmeticzjunkie and like my Facebook Page Cosmeticz Junkie. 


Wednesday 13 March 2013

How to Do An Arabian Style Eye With Urban Decay Palette Tutorial

Hey everyone it's been a while and I'm sorry but I hope you will enjoy the following tutorial . I love doing dramatic eyes and love the Arabian eye look which is a heavy smokey look using thick liner on the top and bottom of the eyes. I recently purchased the Urban Decay palette , which I totally love and is definitely one of my go to palette, the looks you can create with this palette are endless . Remember the products I use are just for guidance only if you have the colours in different products then please feel free to use them or even experiment with different colours. As you'll see in the following pictures for this technique I used  sellotape to the outer corner of my eye as a guide , this method makes the whole process alot quicker and easier to apply the eyeshadows and even better for getting that perfect winged out eyeliner. It leaves you with a crisp,clean line that gives an amazing finish to the look. Take a look at myother tutorial where I used the tape to create a perfect winged eyeliner , use the link to view it http://cosmeticzjunkie.blogspot.co.uk/2013/01/how-to-do-winged-eyeliner.html

Lets get started : 


Step 1: Place the tape to the outer corner of the eye, if using normal sellotape remember to scotch the tape off a bit by applying it your hands a couple avoid any discomfort .


Step 2 : Apply a primer to your eye , I used my NYX eye base in white


Step 3 : Apply a transition colour to the crease of your eye and blend it out, I used a colour a few shades darker than my skin tone, this will help the look to blend out gradually . I used the colour Buck from the palette . 


Step 4 : Highlight the browbone with a very pale shimmery white and blend it into the transition colour . I used Virgin from the UD Palette.


Step 5 : Use the shimmery pink and shimmery taupe all over your eyelid upto the crease . I used Sin & Sidecar out of the palette.


Step 6: Add a dark brown to the crease and outer V , I used a mixture of Darkhorse and Smog .

 Step 7: Using a black gel liner draw a thick line upwards along the tape, doesn't have to be neat 


Step 8: Using a black eyeshadow blend out the the line you have just applied and blend into the crease slightly, I used the colour Creep, gradually build this up until you are happy with the blend. 


Step 9: Apply the liquid liner to the top lashline and wing out to add definition, this part is really easy with the tape :)


Step 10: Now for magic ...... remove the tape and you should have a clean crisp line :)


Step 11: Add gel liner to your bottom lash line and join it to the outer corner , keeping it quite thick . 


Step 12: Line the inside of your eye top and bottom, I used my gel liner for an intense look . 


Step 13 : Add lashes and your done xx

Final Look 


If you have any questions or feedback I would love to hear from you. Remember, to keep up to date with my latest posts and news, follow me on Twitter @cosmeticzjunkie and like my Facebook Page Cosmeticz Junkie. 


Thursday 14 February 2013

Black Glittery Smokey Eye Featured On Preenme

My recent post featured on Preen Me through Facebook, check this page out there's so many ideas on there for looks to create . Let me know if you would like me to recreate anything for you .

Tuesday 5 February 2013

How to Do A Black and Gold Glitter Smokey Eye

I recently bought some glitter from NYX cosmetics and thought I'd experiment with it a liitle, so I've created a smokey eye using the gold glitter to make the colour pop!! This look is perfect for Valentines which is fast approaching us or would look great on a night out, this glitter is really easy to use and adds so much sparkle to the look . Just to let you know the  products I use are just as a guide, if you have the colour in a different product then please feel free to use them. Here's what I did...............................................

Step 1:

I primed my eyes with a white Nyx base pot and then added a light matte brown to my socket , I used the colour Buck from my Urban Decay Naked Palette.


Step 2:

Using a darker shimmery brown go over the socket blending it in , I used the colour Darkhorse from my Naked palette, I also used a light pink shimmer (Virgin :Naked Palette) to highlight the browbone and blended it into the
brown. I layered and blended the brown and pink about twice .


Step 3:

With a small brush draw a line to the outer V like shown in the picture, I used Creep which is glittery black and Gunmetal which is dark grey shimmer , from my Naked Palette.
With a blending brush begin to start to blend the V you have just applied, this will add the smokiness to the look .


Step 4:

Add a gold cream  to the eyelid and set it with a gold eyeshadow , I used an Illamasqua Liquid Metal Cream in the colour Electrum and went over it with Half baked from the Naked Palette.

I used a cream eye shadow for the gold base but you can use a pencil, or gel liner if you haven't got a cream . You could even use the Loreal Infallible Eyeshadow in Goldmine , which I have used in my other tutorial and swatched .


Step 5:

Now for the fun bit .... the glitter!!!

I used a glitter liner I had in a gold and brushed it over the gold eyeshadoe on my lid , whilst it was still wet , with a small brush I patted some of my NYX glitter over the top of it.

This is such a quick and easy way of applying the glitter, other methods use eyelash glue or you can get specially designed glue for the glitter but this way works fine . Blend some gold into the socket just so there aren't any harsh lines .


Step 6:

Clean away any glitter that has fallen around your eye with a wipe , and then line under your eyes with a balck liner. Smudge the line upwards and into your eyeshadow. Run some black eyeshadow to your lower lash line and blend it out to give that sexy, smokey look.


Step 7:

Line the top of your eyes with a gel liner in black and wing it out, also take the gel under the eye and blend  it in .

Line inside your eye top and bottom , I used my gel liner for this as it really intensifies the look .

I also went in with the black eyeshadow to the outer corner again but this is personal preference and depends on how smokey you like your look .


Step 8:

Add lashes and your done , ready to sparkle for your Valentine ;)


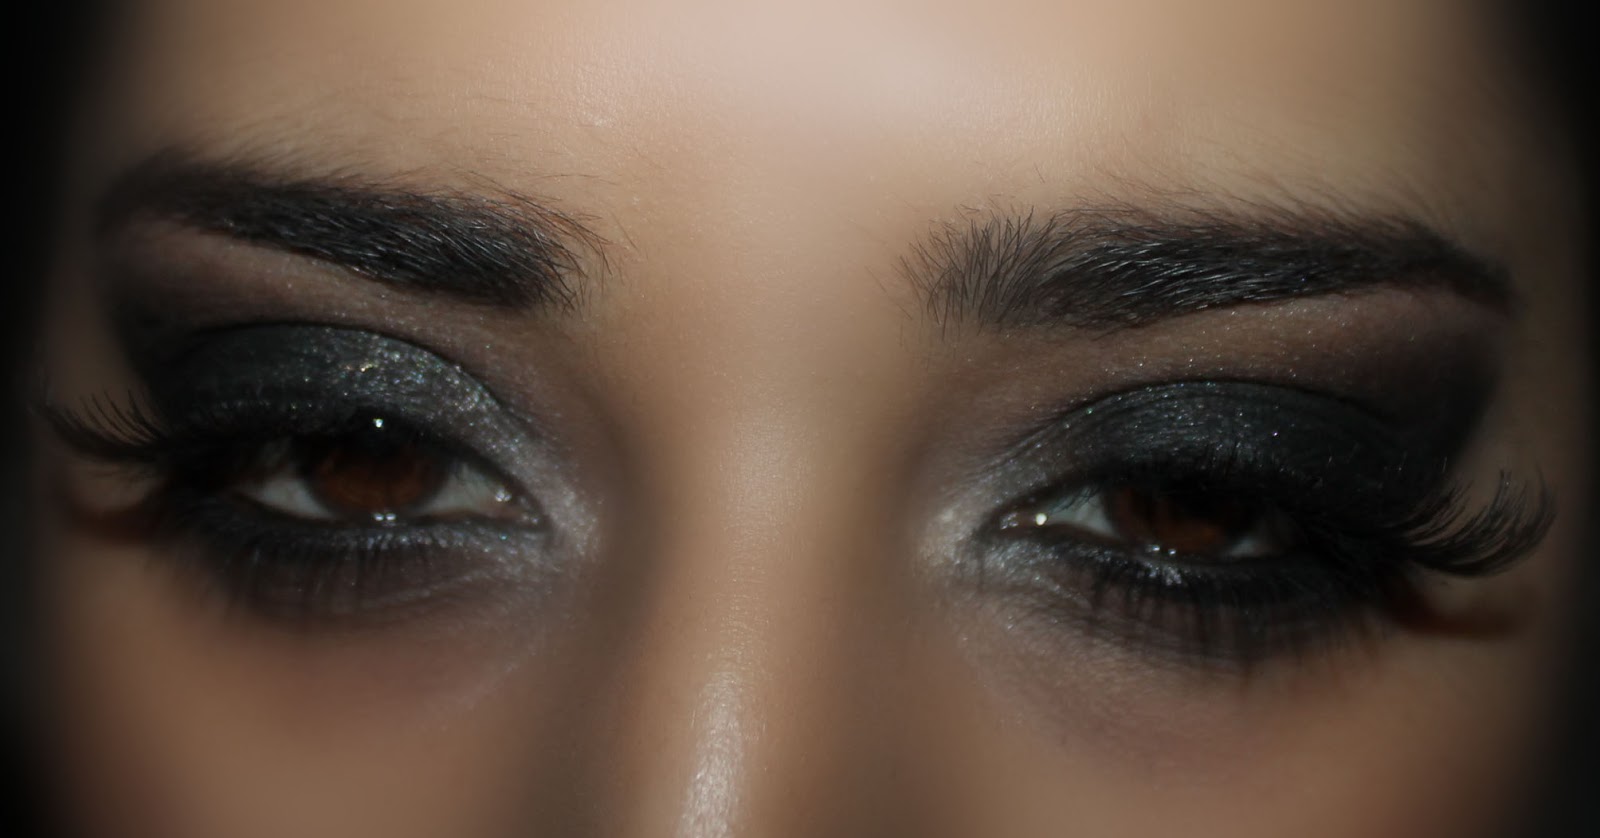
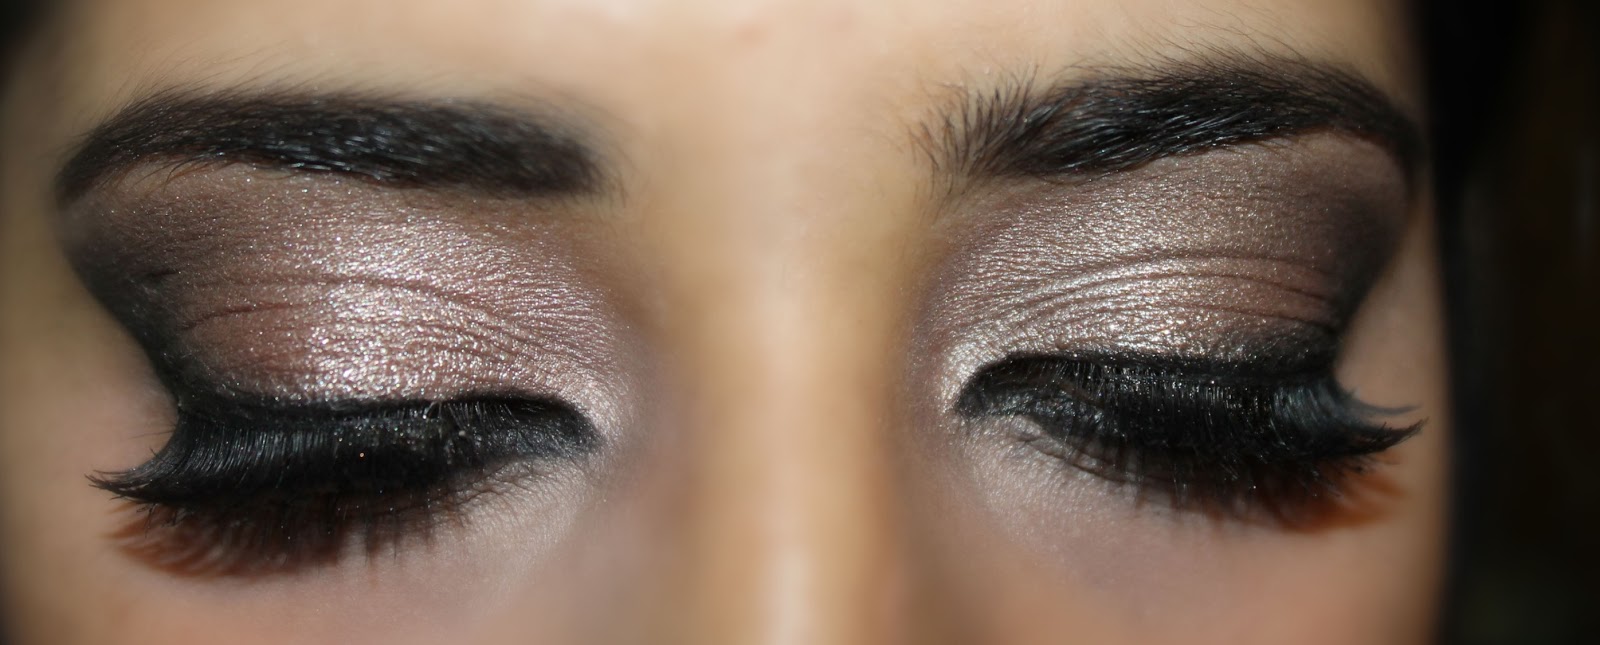
Here's some pics of the final look :


I know this picture is abit dark but I wanted you to see how much it does actually sparkle . 


I used a Glitter liner as base for the Glitter to stick , you can get these from everywhere now , it doesn't have to be anything expensive because you will be adding more glitter to it anyway . I used the Nyx Glitter Mania to enhance the the look , cost about £2.50. 

I appreciate any comments and feedback. Remember to like my facebook page Cosmeticz Junkie and also you can keep up to date with my blog posts on twitter @cosmeticzjunkie.